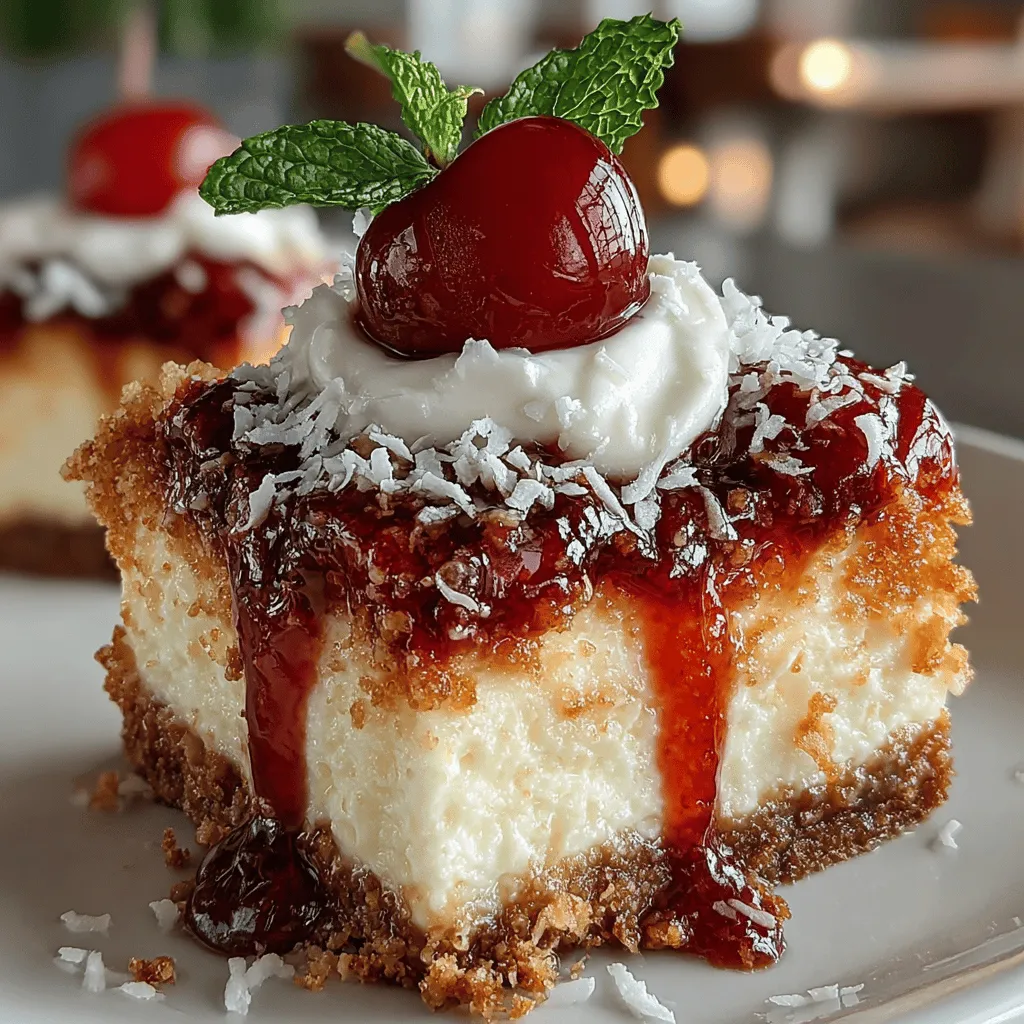
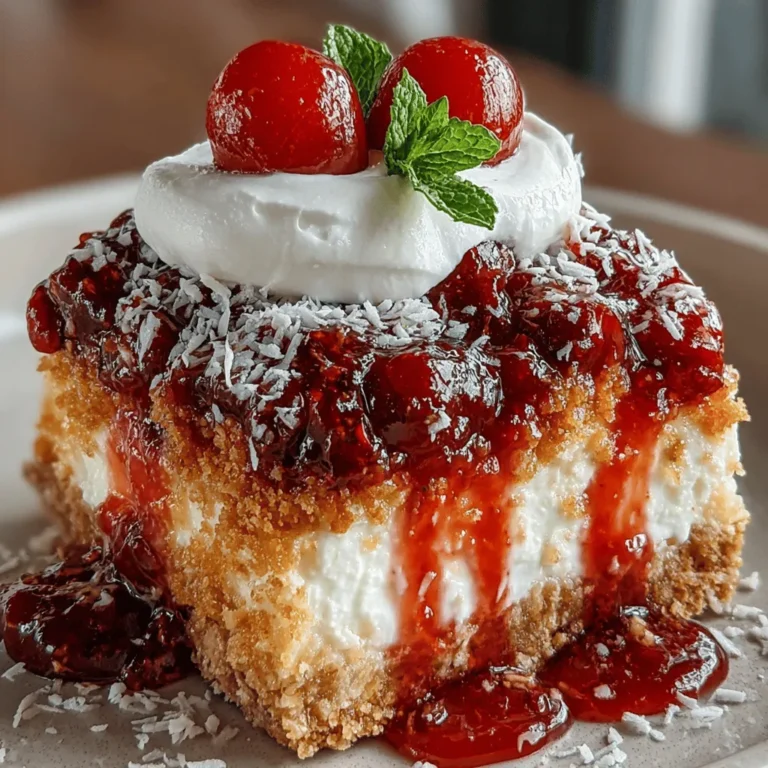
Chilled Cherry Delight Bars: A Refreshing Treat for Any Occasion
As the warm days of summer approach, the desire for light and refreshing desserts becomes paramount. One such indulgence is the Chilled Cherry Delight Bars, a delightful and visually appealing treat that showcases the vibrant flavor of cherries. These bars are not only a feast for the eyes but also a healthy alternative to many traditional desserts, making them the perfect option for those looking to satisfy their sweet cravings without the guilt. The combination of fresh cherries, creamy yogurt, and a nutty crust creates a harmonious blend of flavors and textures that will leave you wanting more.
The Appeal of Seasonal Fruits in Desserts
Seasonal fruits play a crucial role in enhancing the flavor profile of desserts. Using fresh produce during its peak season not only elevates the taste of your recipes but also provides optimal nutritional benefits. Cherries, in particular, are a summer staple revered for their natural sweetness and vibrant color. They are packed with antioxidants, vitamins, and minerals, making them an excellent choice for a wholesome treat. Incorporating cherries into your dessert not only highlights their seasonal availability but also allows you to enjoy the myriad of health benefits they offer.
Chilled Cherry Delight Bars are a perfect representation of how to creatively use seasonal fruits in desserts. With their refreshing layers and delightful crunch, these bars serve as an excellent way to celebrate the flavors of summer. Whether you are planning a picnic, a family gathering, or simply a cozy night in, these cherry bars will impress your guests and family alike.
Understanding the Ingredients
To create the perfect Chilled Cherry Delight Bars, it’s essential to understand the role of each ingredient in the recipe. Here’s a closer look at what makes this dessert so special:
1. Fresh vs. Frozen Cherries: When it comes to cherries, you have the option of using either fresh or frozen varieties. Fresh cherries offer a juicy, firm texture and vibrant flavor, making them ideal for this recipe when they are in season. However, frozen cherries can be a convenient alternative, providing similar nutritional benefits and a slightly softer texture once thawed. Both options are rich in vitamins C and K, fiber, and antioxidants, making them a healthy choice.
2. The Role of Sugar: Balancing sweetness is key in fruit desserts. The natural sugars in cherries can be complemented with a bit of added sugar, ensuring that the final product is neither too sweet nor too tart. Adjusting the amount of sugar allows you to tailor the recipe to your taste preference, creating a dessert that perfectly suits your palate.
3. Lemon Juice: Adding lemon juice to the cherry mixture serves multiple purposes. It enhances the overall flavor, adding a zesty brightness that complements the cherries beautifully. Additionally, the acidity from the lemon helps to balance the sweetness, ensuring a well-rounded taste experience.
4. Almond Meal vs. Ground Almonds: The crust of the Chilled Cherry Delight Bars can be made using either almond meal or ground almonds. Almond meal, which is made from blanched almonds, provides a finer texture and a slightly different flavor profile compared to coarser ground almonds. Both options are rich in healthy fats, protein, and fiber, making them a nutritious choice for the base of your dessert.
5. Shredded Coconut: Coconut adds a delightful flavor and texture to the bars. It not only enhances the taste but also contributes additional nutrients, including healthy fats and fiber. Opting for unsweetened shredded coconut will keep the sugar content in check while still providing that tropical flair.
6. Oats: Oats form the nutritious base of the crust, lending a hearty texture and a wealth of health benefits. They are an excellent source of fiber, which can help keep you feeling full and satisfied. The combination of oats and nuts in the crust not only provides a delicious crunch but also helps to bind the ingredients together.
7. Sea Salt: A pinch of sea salt enhances the sweetness of the cherries and other ingredients, creating a more profound flavor experience. It’s an essential component that balances the overall taste and elevates the dessert.
8. Coconut Oil: Using coconut oil in the crust is a fantastic way to incorporate healthy fats into your dessert. It adds moisture and richness, while also imparting a subtle coconut flavor that pairs beautifully with the other ingredients.
9. Vanilla Extract: The addition of vanilla extract enriches the flavor depth of the bars. It brings a warm, aromatic quality that complements the cherries and adds complexity to the overall taste.
10. Greek Yogurt: Greek yogurt provides creaminess and a boost of protein, making the dessert more satisfying. For those seeking a dairy-free alternative, coconut yogurt or almond yogurt can be excellent substitutes, ensuring everyone can enjoy this delightful treat.
Step-by-Step Instructions for Chilled Cherry Delight Bars
Now that we’ve established the importance of each ingredient, it’s time to dive into the preparation of Chilled Cherry Delight Bars. This step-by-step guide will walk you through the process, ensuring that your dessert turns out perfectly every time.
Preparing the Cherry Mixture
1. Choosing the Right Cherries: Start by selecting ripe, juicy cherries. If using fresh cherries, look for those that are firm to the touch and have a deep, vibrant color. If you opt for frozen cherries, ensure they are unsweetened and free from added preservatives.
2. Cooking the Cherries: In a medium saucepan, combine your prepared cherries with a bit of sugar and lemon juice. Cook over medium heat, stirring occasionally, until the mixture begins to bubble. Allow it to simmer for 5-7 minutes, or until the cherries have softened and released their juices. This step not only intensifies the flavor but also helps to create a delightful cherry sauce.
3. Cooling the Mixture: Once the cherry mixture has reached the desired consistency, remove it from the heat and let it cool completely. This step is crucial, as adding hot filling to the crust can cause it to become soggy. Patience here will pay off in the texture of your final product.
Making the Crust
1. Mixing the Dry Ingredients: In a large mixing bowl, combine your almond meal (or ground almonds), oats, shredded coconut, and a pinch of sea salt. Mixing these dry ingredients together ensures that they are evenly distributed, which is essential for achieving a consistent crust.
2. Incorporating the Wet Ingredients: Add melted coconut oil and a splash of vanilla extract to the dry mixture. Stir until the ingredients are well combined and form a crumbly texture. The mixture should hold together when pressed, but it should not be overly wet.
3. Pressing into the Pan: Line a baking dish with parchment paper for easy removal. Press the crust mixture evenly into the bottom of the dish, ensuring a firm and compact base. This step is crucial for achieving the right texture; a well-pressed crust will hold up beautifully when cut into bars.
4. Baking the Crust: Preheat your oven and bake the crust for approximately 15-20 minutes, or until it turns a light golden brown. Keep an eye on it to prevent over-baking, as a crispy crust will complement the soft cherry filling.
With the cherry mixture prepared and the crust baked to perfection, you’re already well on your way to creating a delightful batch of Chilled Cherry Delight Bars. As you continue through the recipe, be sure to pay attention to the details, as they will make all the difference in the final result. Stay tuned for the next part of this article, where we will explore the final assembly and chilling process that will transform these components into a refreshing summer treat.

How to Achieve the Perfect Crumbly Mixture
Creating the ideal crumbly base for your Chilled Cherry Delight Bars is crucial for achieving that delightful texture. Start by combining your dry ingredients—flour, sugar, and a pinch of salt—in a mixing bowl. Make sure to whisk them together thoroughly to ensure even distribution. Next, incorporate your cold, cubed butter. Using a pastry cutter or your fingers, work the butter into the dry ingredients until the mixture resembles coarse crumbs. This step is essential; the butter should be cold to create a flaky texture when baked.
For an extra layer of flavor, consider adding a teaspoon of vanilla extract or almond extract to the mixture. This subtle enhancement can elevate the overall taste profile. Once you’ve achieved the desired crumbly texture, it’s time to press it into your prepared baking dish.
Assembling the Bars
Once your crumbly mixture is ready, it’s time to assemble the bars. Press the crumbly base evenly into the bottom of a greased 9×9-inch baking dish. Use the back of a measuring cup or your fingers to pack it down firmly. This will create a solid foundation for your cherry filling.
Next, prepare your cherry filling using fresh or frozen cherries. If using fresh cherries, pit and slice them; if using frozen, allow them to thaw and drain any excess liquid. In a bowl, combine the cherries with sugar, cornstarch, and a squeeze of lemon juice. The sugar will help to enhance the natural sweetness of the cherries, while the cornstarch will thicken the mixture when baked. Spread the cherry filling evenly over the crumbly base.
Layering Techniques for Aesthetic and Flavor Balance
For a beautiful presentation and balanced flavor, consider adding a light sprinkle of cinnamon or nutmeg over the cherry filling before adding the top layer. This will not only enhance the flavor but also add visual appeal. Once your cherry layer is in place, take the remaining crumbly mixture and sprinkle it over the top. This creates a lovely layer that will brown beautifully in the oven.
To ensure even baking, spread the topping gently with your fingers, allowing some cherry filling to peek through. This not only looks appealing but also provides a hint of what’s inside.
The Significance of Parchment Paper for Easy Removal and Serving
Using parchment paper is a game-changer for this recipe. Before pouring in your crumbly mixture, line the baking dish with parchment paper, leaving some overhang on the sides. This will serve as handles to help you lift the bars out of the pan once they have cooled. It also prevents the bars from sticking to the dish, making serving a breeze. After baking, allow the bars to cool completely in the pan before lifting them out using the parchment paper.
Chilling the Bars
Once the bars have cooled, it’s time to chill them. Chilling not only firms up the texture but also enhances the flavors, allowing them to meld together beautifully. The science behind chilling desserts involves the solidification of fats, which contributes to a smoother, creamier texture.
Recommended Chilling Time for Best Results
For optimal results, place your assembled Chilled Cherry Delight Bars in the refrigerator for at least 2 hours. However, if you can wait longer, allowing them to chill overnight will yield an even more pronounced flavor and texture.
Serving Suggestions
When it comes to serving your Chilled Cherry Delight Bars, presentation matters. Cut the bars into squares or rectangles before serving, and arrange them on a decorative platter. To elevate the visual appeal, dust the tops with powdered sugar or drizzle with a simple glaze made of powdered sugar and lemon juice.
Presentation Tips for a Visually Appealing Dish
Adding a fresh mint leaf on top of each bar not only enhances the visual appeal but also adds a refreshing contrast to the sweetness of the cherries. Additionally, consider serving the bars with a dollop of whipped cream on the side or a scoop of vanilla ice cream for an indulgent treat.
Nutritional Analysis
A breakdown of the key nutritional components of your Chilled Cherry Delight Bars is essential for those mindful of their dietary intake. Each serving typically contains:
– Calories: Approximately 180-220, depending on portion size and ingredients.
– Carbohydrates: 25-30 grams
– Fat: 8-10 grams
– Protein: 2-3 grams
– Fiber: 1-2 grams
Health Benefits of Key Ingredients in Chilled Cherry Delight Bars
Cherries are packed with antioxidants and vitamins, particularly vitamin C, which supports immune health. The fiber content in cherries can also aid digestion. Meanwhile, using whole grain flour instead of refined flour can increase the fiber content, making these bars a healthier dessert option.
Caloric Considerations and Portion Sizes for Mindful Eating
For mindful eating, consider cutting the bars into smaller portions. This will allow you to enjoy the delightful flavors without overindulging. Aim for a serving size of approximately 1-2 bars, depending on your dietary needs and goals.
Culinary Tips for Success
To ensure your Chilled Cherry Delight Bars turn out perfectly, keep the following tips in mind:
Common Pitfalls to Avoid When Making Chilled Cherry Delight Bars
1. Overmixing the Crust: Be gentle when mixing your crumbly base; overmixing can lead to tough bars.
2. Not Chilling Long Enough: Rushing the chilling process will result in a softer texture; patience is key.
3. Skipping the Parchment Paper: This can lead to messy serving and may ruin the perfect square shape of your bars.
Suggested Variations for Dietary Preferences
If you’re looking to cater to specific dietary preferences, consider these variations:
– Vegan Option: Substitute butter with coconut oil or a vegan butter alternative and use plant-based milk in the filling.
– Gluten-Free Option: Swap regular flour for a gluten-free blend to accommodate gluten sensitivities.
Storage Tips to Maintain Freshness and Flavor Over Time
Store your Chilled Cherry Delight Bars in an airtight container in the refrigerator. They will stay fresh for up to a week. For longer storage, consider freezing them. Cut the bars into individual portions, wrap them tightly in plastic wrap, and place them in a freezer-safe container. They can last in the freezer for up to three months.
Conclusion
Chilled Cherry Delight Bars are not just a dessert; they are a delightful summer treat that brings joy and refreshment. With their perfect crumbly texture, vibrant cherry filling, and cooling sensation, they are ideal for warm days.
I encourage you to experiment with the recipe, whether by adding different fruits, adjusting the sweetness, or incorporating unique spices. The beauty of homemade desserts lies in their versatility, allowing you to make them your own.
Creating and sharing these delicious bars is a wonderful way to bring people together, celebrating the joy of summer with a sweet, refreshing dessert. Enjoy the process, and savor the delightful results!


