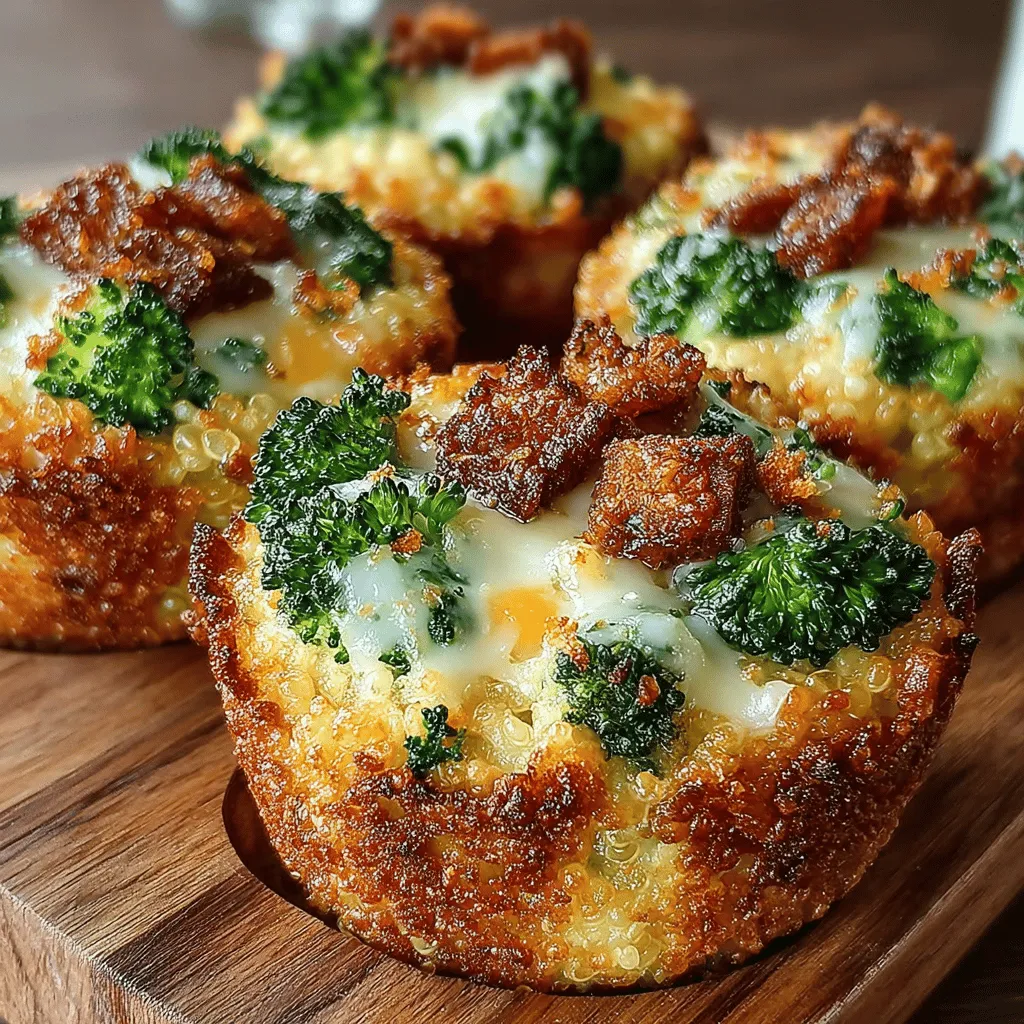
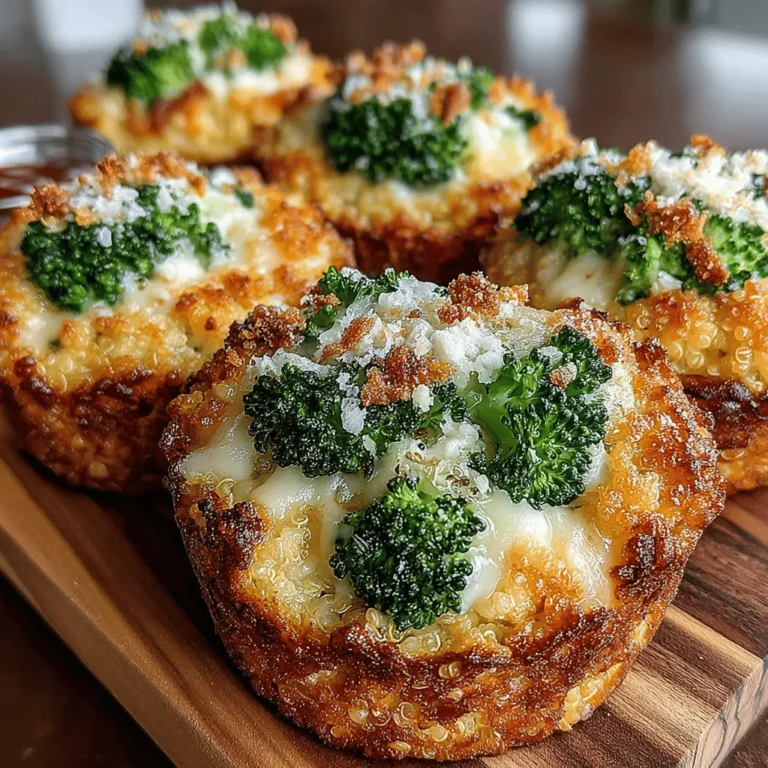
Cheesy Green Goodness Quinoa Cups Recipe
In a world where healthy eating is becoming increasingly important, finding snacks that are both nutritious and delicious can often feel like a daunting task. Enter the Cheesy Green Goodness Quinoa Cups—a delightful solution that caters to a variety of dietary needs without sacrificing flavor. These quinoa cups are perfect for those seeking a wholesome snack, appetizer, or side dish that appeals to all ages. Whether you’re preparing a family meal or a gathering with friends, these treats are sure to impress.
Quinoa has surged in popularity over the past decade, and for good reason. This ancient grain is not only packed with nutrients but is also versatile enough to be used in a wide array of recipes. The Cheesy Green Goodness Quinoa Cups take advantage of quinoa’s incredible properties, blending it with vibrant broccoli and rich cheeses to create a dish that is as nutritious as it is satisfying.
The Nutritional Benefits of Quinoa
Quinoa, often dubbed a superfood, is a complete protein source, meaning it provides all nine essential amino acids required by the body. This makes it an excellent choice for vegetarians and anyone looking to boost their protein intake. Additionally, quinoa is high in fiber, which contributes to digestive health and helps maintain a feeling of fullness, making it a great option for those watching their weight.
Beyond its protein and fiber content, quinoa is also gluten-free, making it a suitable alternative for individuals with gluten sensitivities or celiac disease. Its unique texture and nutty flavor allow it to adapt seamlessly to various dishes, from salads and bowls to baked goods like our Cheesy Green Goodness Quinoa Cups.
Why Broccoli and Cheese Make a Perfect Pair
When it comes to flavor combinations, few are as harmonious as broccoli and cheese. Broccoli, a cruciferous vegetable, is a powerhouse of vitamins and minerals, including Vitamin K, Vitamin C, and folate. It also contains antioxidants and has been linked to numerous health benefits, including anti-inflammatory properties and improved heart health.
On the other hand, cheese adds a creamy richness and depth of flavor that enhances the overall taste of any dish. Cheddar and Parmesan cheese not only contribute calcium and protein but also create a delightful contrast to the freshness of the broccoli. Together, they create a nutrient-dense combination that elevates the Cheesy Green Goodness Quinoa Cups from simple snacks to a satisfying culinary experience.
Ingredients Overview
To create these Cheesy Green Goodness Quinoa Cups, you’ll need the following ingredients, each playing a crucial role in building flavor and nutrition:
– Quinoa: Originating from the Andean region of South America, quinoa has been cultivated for thousands of years. It boasts a high protein content, is rich in antioxidants, and provides essential minerals such as magnesium and iron.
– Vegetable Broth: Using vegetable broth instead of water not only enhances the flavor of the quinoa but also infuses it with additional nutrients. Opting for low-sodium broth can help keep the dish healthy while maintaining that savory taste.
– Broccoli: Fresh broccoli florets add a lovely crunch and vibrant color to the quinoa cups. Packed with dietary fiber, vitamins K and C, and various phytonutrients, broccoli is a fantastic addition to any meal.
– Cheddar and Parmesan Cheeses: Cheddar cheese brings a sharpness that complements the mild flavor of quinoa, while Parmesan adds a nutty and salty richness. Together, they create a delightful cheesy base that enhances the overall flavor profile of the cups.
– Eggs and Milk: The binding agents in this recipe, eggs and milk, help hold the quinoa and vegetables together, ensuring that the cups maintain their shape while baking. Eggs are also a great source of protein and healthy fats.
– Spices and Seasonings: A touch of garlic powder, onion powder, and paprika elevates the flavor of the quinoa cups. These spices add warmth and depth, making each bite more enjoyable.
– Breadcrumbs: While optional, breadcrumbs can provide a crispy texture on the outside of the quinoa cups, giving them a delightful crunch that contrasts with the soft interiors.
Step-by-Step Instructions
Now that you have a thorough understanding of the ingredients, let’s dive into the preparation of the Cheesy Green Goodness Quinoa Cups. Follow these step-by-step instructions to create your own batch of these delicious snacks:
1. Prepare the Quinoa: Begin by rinsing one cup of quinoa under cold water to remove any bitterness. In a medium saucepan, combine the rinsed quinoa with two cups of vegetable broth. Bring it to a boil, then reduce the heat and let it simmer for about 15 minutes, or until the quinoa is fluffy and the liquid has been absorbed. Remove it from the heat and let it sit for a few minutes before fluffing it with a fork.
2. Cook the Broccoli: While the quinoa is cooking, steam or blanch the broccoli florets until they are tender but still bright green—about 3-5 minutes. Once cooked, chop the broccoli into small pieces and set it aside to cool slightly. This will ensure that the broccoli retains its vibrant color and crisp texture in the final dish.
3. Mix the Ingredients: In a large mixing bowl, combine the cooked quinoa, chopped broccoli, one cup of shredded cheddar cheese, half a cup of grated Parmesan cheese, two beaten eggs, and a splash of milk. Add in your spices: one teaspoon of garlic powder, one teaspoon of onion powder, and half a teaspoon of paprika. Season the mixture with salt and pepper to taste.
4. Prepare the Muffin Tin: Preheat your oven to 375°F (190°C). Grease a muffin tin with cooking spray or olive oil to prevent the quinoa cups from sticking. If you’re using breadcrumbs, you can sprinkle a bit at the bottom of each muffin cup for an added crunch.
5. Fill the Muffin Tin: Spoon the quinoa mixture into each muffin cup, pressing down slightly to ensure they hold their shape. Fill each cup to the top, as they will puff up slightly while baking.
With these steps completed, you’re well on your way to enjoying a batch of Cheesy Green Goodness Quinoa Cups. Stay tuned for the next part of this article, where we will explore the baking process and additional serving suggestions.

Creating delicious and healthy snacks at home is both rewarding and fulfilling. One of the standout recipes that combines health and flavor is the Cheesy Green Goodness Quinoa Cups. These little cups are packed with nutrients, flavor, and are remarkably easy to make. In this section, we will dive deep into the preparation process, serving suggestions, storage tips, and variations, ensuring you have everything you need to create these delightful treats.
Preheating the Oven
Before you embark on your cooking journey, preheating your oven is a crucial step that should never be overlooked. Preheating ensures that your quinoa cups cook evenly and achieve that perfect golden-brown color. Set your oven to 375°F (190°C) and allow it to heat thoroughly while you prepare the other ingredients. This way, as soon as you place your muffin tin in, the cooking process can begin immediately, leading to a more consistent texture throughout each cup.
Cooking Quinoa
Quinoa is the star ingredient in these Cheesy Green Goodness Quinoa Cups, and how you prepare it can significantly affect the final product. Start by rinsing the quinoa under cold water for about 2 minutes. This step is vital as it removes the natural coating called saponin, which can impart a bitter taste if not washed off.
Once rinsed, combine the quinoa with water in a pot at a ratio of 1 part quinoa to 2 parts water. Bring it to a boil, then reduce the heat to a simmer, covering the pot. Let it cook for about 15 minutes or until all the water has been absorbed. Turn off the heat and let it sit, covered, for an additional 5 minutes to allow it to steam. This results in fluffy quinoa that will serve as the perfect base for your cups.
Preparing Broccoli
To maximize the nutritional benefits and vibrant color of your broccoli, steaming is the preferred cooking method. Begin by cutting the broccoli into small florets. Bring a small pot of water to a boil and fit a steamer basket over the pot. Place the broccoli florets in the basket, cover, and steam for about 3-4 minutes until they are bright green and tender but still crisp. Steaming preserves the vitamins and minerals that might otherwise be lost in boiling water, ensuring that your Cheesy Green Goodness Quinoa Cups are packed with nutrients.
Mixing Ingredients
With your quinoa and broccoli ready, it’s time to bring all your ingredients together. In a large mixing bowl, combine the cooked quinoa, steamed broccoli, shredded cheese, eggs, breadcrumbs, and your choice of seasonings. Mix gently but thoroughly to ensure even distribution of flavors and textures. This step is key to achieving that delightful cheesy taste in every bite. Consider adding a pinch of salt and pepper, along with herbs like dill or basil for an extra flavor kick that will elevate your cups.
Filling the Muffin Tin
Now comes the fun part: filling the muffin tin! Lightly grease a standard muffin tin or use silicone muffin liners for easy removal. Using a spoon or an ice cream scoop, fill each muffin cup with the quinoa mixture, pressing down slightly to ensure they hold their shape. Aim for a dome shape on top for a visually appealing presentation. It’s essential not to overfill, as the cups will puff up slightly while baking. You want them to have a nice rise without spilling over.
Baking
Once your muffin tin is filled, carefully place it in the preheated oven. Bake for 20-25 minutes or until the tops are golden brown and a toothpick inserted into the center comes out clean. Look for a slight firmness when pressed gently on top; this indicates they are set and ready to come out. Once baked, allow the quinoa cups to cool in the pan for about 5 minutes before transferring them to a wire rack. This cooling period allows them to firm up and makes them easier to remove without breaking.
Serving Suggestions
These Cheesy Green Goodness Quinoa Cups are incredibly versatile and can be enjoyed in several ways. Serve them warm as a snack, appetizer, or even as part of a main dish alongside a fresh salad for a complete meal. They are perfect for lunch boxes, picnics, or casual gatherings. For an added twist, you can serve them with a dollop of Greek yogurt or a side of salsa for extra flavor. The cups are also delightful when paired with a simple avocado salad, adding creaminess to balance out the cheesy goodness.
Storage and Meal Prep Ideas
To keep your Cheesy Green Goodness Quinoa Cups fresh, allow them to cool completely before storing. Place them in an airtight container in the refrigerator, where they will remain fresh for up to five days. For longer storage, consider freezing them. To freeze, wrap each cup in plastic wrap and place them in a freezer-safe bag. They can last in the freezer for up to three months. When ready to enjoy, simply reheat them in the microwave for about 30 seconds to 1 minute or bake them from frozen at 350°F (175°C) for about 15-20 minutes until heated through.
Variations and Customizations
One of the best aspects of the Cheesy Green Goodness Quinoa Cups is their adaptability. You can easily customize the recipe to suit your personal taste or dietary needs.
Vegetable Swaps
Feel free to experiment with other vegetables! Spinach, kale, or grated carrots can be excellent substitutes or additions. For a more colorful mix, consider using red bell peppers or zucchini, which will also provide a delightful crunch.
Cheese Alternatives
For those following a dairy-free diet, there are numerous cheese alternatives available, such as cashew cheese or nutritional yeast for a cheesy flavor without the dairy. You could also use different types of cheese, such as feta, goat cheese, or even a spicy pepper jack for an added kick.
Spice Adjustments
Adjusting the spices can completely change the flavor profile of your quinoa cups. Experiment with smoked paprika, cumin, or even a bit of cayenne pepper for heat. Fresh herbs, like parsley or cilantro, can also add a refreshing twist. Don’t hesitate to get creative and make it your own!
Conclusion
The Cheesy Green Goodness Quinoa Cups are a fantastic way to incorporate healthy ingredients into your diet while satisfying your taste buds. With their delightful combination of textures and flavors, they are perfect for any occasion, from casual snacks to more formal gatherings. Packed with protein, fiber, and vitamins, these quinoa cups not only provide nutritional benefits but also cater to a variety of palates, making them a must-try recipe. Embrace the versatility of this dish and enjoy adapting it to your preferences. Whether you serve them fresh or frozen, you can always count on these cups to deliver a healthy, delicious option that everyone will love. So, gather your ingredients and get ready to create a batch of these wholesome treats that will surely impress!


