

Crunchy Peanut Butter Rice Bars Recipe
In a world increasingly focused on health and wellness, finding nutritious yet satisfying snacks can be a challenge. Enter the crunchy peanut butter rice bars—a delightful blend of taste, texture, and nutrition that appeals to both kids and adults alike. These homemade bars are not only easy to make but also serve as an excellent alternative to store-bought snacks, which are often laden with preservatives and artificial ingredients. Whether you need a quick energy boost or a delightful treat to enjoy between meals, these rice bars tick all the boxes.
The importance of healthy snacks in our daily diet cannot be overstated. They help maintain energy levels, curb hunger, and prevent unhealthy cravings. With an increasing number of people seeking healthier lifestyle choices, having a reliable recipe for nutritious snacks like crunchy peanut butter rice bars can be invaluable. Packed with wholesome ingredients, these bars offer a perfect balance of protein, fiber, and healthy fats, making them an ideal option for anyone looking to enhance their snacking game.
The Appeal of Crunchy Peanut Butter Rice Bars
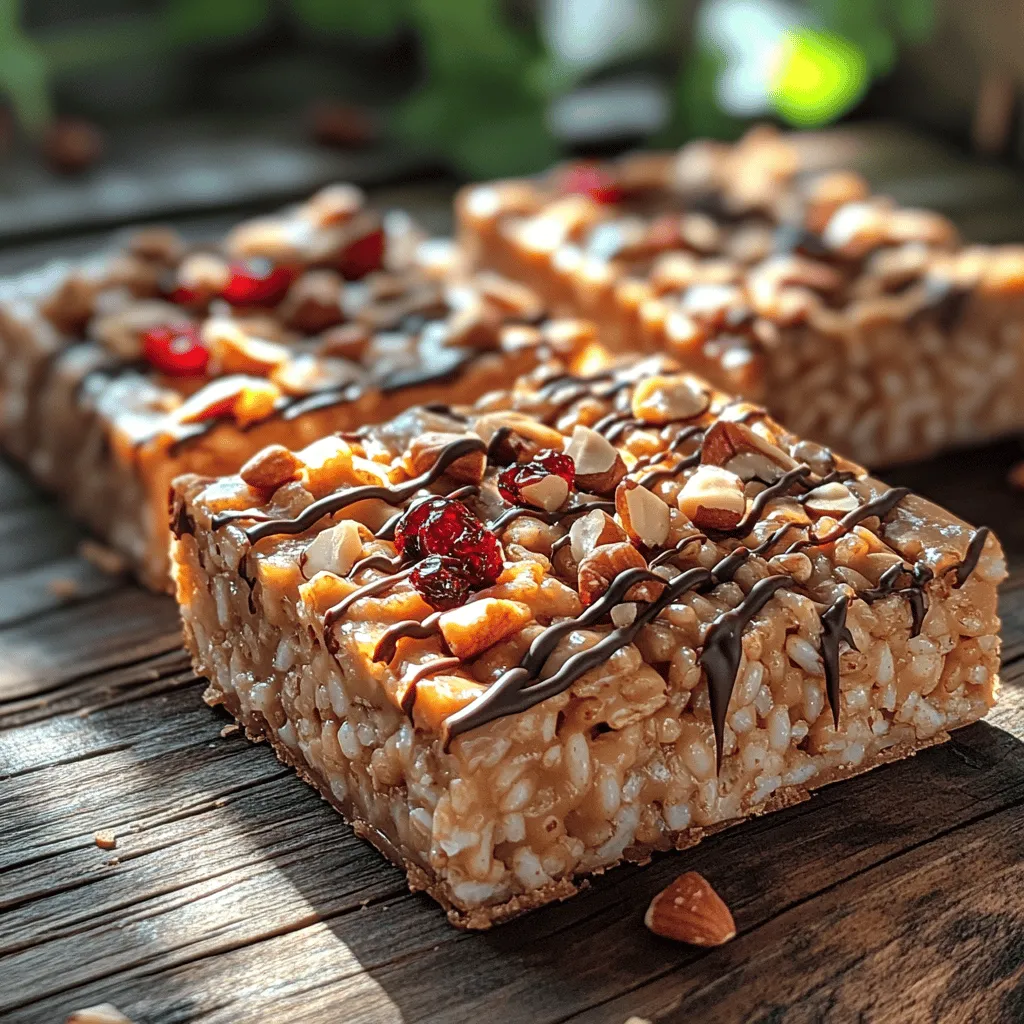
The allure of crunchy peanut butter rice bars lies in their delightful texture and rich flavor profile. Each bite delivers a satisfying crunch from the puffed rice combined with the creamy, nutty essence of peanut butter. The addition of chocolate chips elevates the sweetness, while chopped nuts add an extra layer of crunch, making these bars a textural delight.
Moreover, these bars are incredibly versatile, allowing for modifications that cater to various dietary preferences. For those following a vegan lifestyle, substituting honey with maple syrup makes these bars entirely plant-based. Additionally, by selecting gluten-free puffed rice cereal, those with gluten sensitivities can also indulge in this tasty treat without concern.
These crunchy peanut butter rice bars are perfect for various occasions. They serve as a quick snack during busy workdays, a wholesome addition to lunchboxes, or even a post-workout refuel. Their portability makes them easy to take on hikes, road trips, or simply to enjoy at home.
Ingredients Breakdown
To create the perfect crunchy peanut butter rice bars, it’s essential to understand the ingredients that contribute to their deliciousness and nutritional profile. Each component plays a unique role in both flavor and health benefits.
Puffed Rice Cereal
At the core of this recipe is puffed rice cereal. This light and airy ingredient is not only low in calories but also provides a satisfying crunch that forms the base of the bars. Puffed rice is often fortified with vitamins and minerals, making it a nutritious choice. For those looking for alternatives, puffed quinoa or puffed millet can be used to add an interesting twist while maintaining the desired texture.
Creamy Peanut Butter
The star of the show, creamy peanut butter, offers a rich, nutty flavor along with numerous health benefits. It is an excellent source of protein, healthy fats, and essential vitamins like Vitamin E and magnesium. When selecting peanut butter, opting for natural varieties that contain minimal ingredients is advisable. This choice ensures that you avoid added sugars and unhealthy oils found in many processed options. Variations like almond or cashew butter can also be used for those with peanut allergies or who simply prefer different nut flavors.
Sweeteners: Honey vs. Maple Syrup
To bind the ingredients and add sweetness, a natural sweetener is necessary. Honey and maple syrup are both popular choices, each with its own benefits. Honey is known for its antibacterial properties and is a great source of antioxidants. On the other hand, maple syrup is lower on the glycemic index, making it a better option for those monitoring blood sugar levels. When choosing a sweetener, consider dietary restrictions and personal preferences to find the best fit for your bars.
Dark Chocolate Chips
To satisfy that sweet tooth, dark chocolate chips make an excellent addition. They not only enhance the flavor but also provide health benefits thanks to their high antioxidant content. Choosing chocolate with at least 70% cocoa ensures you get the most health benefits while minimizing added sugars. For a dairy-free option, look for vegan chocolate chips that contain no animal products.
Chopped Nuts
Incorporating chopped nuts into your rice bars adds a delightful crunch and boosts the nutritional value. Nuts are a good source of protein, healthy fats, and fiber, which can help keep you satiated. Almonds, walnuts, and pecans are excellent choices that pair well with peanut butter. Additionally, they contribute essential nutrients like omega-3 fatty acids and vitamin E.
Dried Fruit
Adding dried fruit not only enhances flavor but also increases the nutritional profile of these bars. Ingredients like raisins, cranberries, or apricots can provide natural sweetness and a boost of vitamins and minerals. When choosing dried fruit, look for options with no added sugars to keep the bars healthier.
Vanilla Extract and Salt
Finally, a splash of vanilla extract and a pinch of salt are essential for rounding out the flavor profile. Vanilla adds a warm, sweet note that complements the nutty peanut butter, while salt enhances all the flavors, making each bite more enjoyable.
Step-by-Step Instructions
Now that we’ve explored the ingredients that make these crunchy peanut butter rice bars so appealing, let’s dive into the initial steps for preparing them.
Preparation of the Baking Dish
Before starting with the mixture, it’s crucial to prepare your baking dish properly. Line an 8×8-inch square baking dish with parchment paper, leaving some overhang for easy removal later. This step ensures that the bars don’t stick to the dish, allowing for a clean cut and perfect presentation.
Melting the Peanut Butter and Sweetener
In a medium saucepan over low heat, combine the creamy peanut butter and your chosen sweetener. Stir gently until both ingredients are melted together and smoothly combined. This step is vital as it creates a sticky mixture that will bind the dry ingredients. To achieve the perfect consistency, make sure not to overheat the mixture, as it can become too runny or scorched.
Adding Flavorings
Once the peanut butter and sweetener are well combined, remove the saucepan from heat and stir in the vanilla extract and a pinch of salt. These flavor enhancers are essential for elevating the overall taste of the bars, adding depth and richness to each bite.
Combining Dry Ingredients
In a separate large mixing bowl, combine your puffed rice cereal, chopped nuts, and dark chocolate chips. It’s crucial to mix these dry ingredients evenly before adding the wet mixture. This ensures that every bar has a consistent flavor and texture throughout.
Mixing Thoroughly
Pour the melted peanut butter and sweetener mixture over the dry ingredients. Using a spatula or wooden spoon, mix everything together until the dry ingredients are fully coated. This step is important to ensure that every bit of puffed rice and nut is infused with the rich peanut butter flavor.
By following these initial steps, you’ll be well on your way to creating a batch of crunchy peanut butter rice bars that are not only delicious but also packed with nutrition. Stay tuned for the next part, where we will cover the final steps to complete this delightful recipe.
Techniques for Ensuring the Mixture is Well-Coated
To achieve that perfect, crunchy texture in your peanut butter rice bars, it’s crucial to ensure that every grain of rice cereal is evenly coated with the sticky peanut butter and honey mixture. Start by combining your peanut butter and honey in a large mixing bowl. Stir well until fully combined. If your peanut butter is particularly thick, consider warming it slightly in the microwave for about 10 seconds to make it easier to mix. Once warm, the peanut butter should blend smoothly with the honey.
Next, add the rice cereal gradually, folding it into the mixture rather than stirring vigorously. This gentle folding action will help ensure that the cereal is evenly coated without breaking it down too much. Once all the cereal is added, you’ll want to make sure every bit is covered by using a spatula or wooden spoon to scrape the sides and bottom of the bowl.
Spreading into the Dish
Once your mixture is well-coated, it’s time to transfer it into a prepared dish. Choose an 8-inch by 8-inch or a 9-inch by 9-inch square baking dish lined with parchment paper for easy removal later. Transfer the mixture into the dish and use the spatula to spread it evenly across the bottom.
Best Practices for Pressing the Mixture Firmly
Pressing the mixture firmly into the dish is essential for ensuring your bars hold together after cutting. Use the back of a measuring cup or your hands (lightly moistened to prevent sticking) to compact the mixture. Press down firmly but gently, making sure to spread it evenly across the dish. Aim for a thickness of about 1 to 1.5 inches. After pressing, take a moment to smooth the top for an even finish.
Melting the Chocolate
A delicious drizzle of chocolate elevates the flavor and appearance of your peanut butter rice bars. To melt the chocolate, you can choose between a microwave method or a double boiler.
Microwave Method Explained; Safety Tips to Prevent Burning
For the microwave method, chop your chocolate into small pieces to promote even melting. Place the chocolate in a microwave-safe bowl and heat it in 30-second intervals, stirring in between. This will help prevent the chocolate from burning. Generally, it should take about 1 to 1.5 minutes to melt fully, depending on the wattage of your microwave. Once melted, let it cool slightly before drizzling over the bars.
Drizzling Chocolate
To create an appealing drizzle effect, use a fork or a piping bag. If you’re using a fork, dip it into the melted chocolate, and then wave it back and forth over the bars to create a pattern. If you prefer a more controlled drizzle, filling a piping bag (or even a zip-top bag with a corner cut off) with the melted chocolate will allow you to create finer lines. Aim for an even spread that covers the top without overwhelming the peanut butter flavor.
Chilling the Bars
After drizzling the chocolate, it’s important to chill the bars in the refrigerator. This step is crucial for setting the chocolate and firming up the peanut butter mixture. Cover the dish with plastic wrap or a lid and refrigerate for at least 1 hour, or until the chocolate is set and the bars feel firm to the touch.
Cutting and Serving
Once the bars have chilled and set, it’s time to cut them into squares. For clean cuts, use a sharp knife dipped in warm water; this will prevent the chocolate from cracking and ensure a smooth edge. Cut the bars into squares or rectangles, depending on your preference.
Tips for Achieving Clean Cuts and Presentation Suggestions
For an attractive presentation, consider arranging the bars on a serving platter or wrapping them individually in parchment paper tied with twine. This not only adds a rustic touch but also makes them easy to grab and go.
Nutritional Information
These Crunchy Peanut Butter Rice Bars not only satisfy your sweet cravings but also provide a nutritious snack option.
Overview of the Nutritional Benefits of the Bars
Each bar is packed with protein from peanut butter, fiber from rice cereal, and healthy fats, making them a wholesome choice for a mid-afternoon snack or a post-workout treat.
Caloric Breakdown Per Serving
Each serving (one bar) contains approximately 150-200 calories, depending on the exact ingredients used and the size of your bars.
Comparison with Store-Bought Snack Bars
When compared to store-bought snack bars, which can often contain artificial ingredients and high sugar levels, these homemade rice bars stand out as a healthier alternative. You control the ingredients, ensuring they are free from preservatives and tailored to your dietary preferences.
Storage and Shelf Life
To keep your Crunchy Peanut Butter Rice Bars fresh, proper storage is essential.
Best Practices for Storing the Bars
Store the bars in an airtight container to maintain their crunchiness. Layer them with parchment paper to prevent sticking if you are stacking multiple bars.
How to Maintain Freshness and Flavor
Keep the container in a cool, dry place, away from direct sunlight or heat sources. If you live in a particularly warm climate, consider refrigerating them to maintain their firmness.
Suggested Duration for Storage in the Refrigerator
These bars can last up to two weeks in the refrigerator. However, they are best enjoyed within the first week for optimal freshness.
Variations and Customizations
One of the best aspects of these Crunchy Peanut Butter Rice Bars is their versatility.
Suggestions for Making the Bars Unique
Get creative with your bars by adding different ingredients to suit your taste preferences. Here are a few ideas:
– Adding Spices: A pinch of cinnamon or nutmeg can give your bars a warm, aromatic flavor.
– Substituting Different Nuts and Dried Fruits: Try using almond butter instead of peanut butter, or incorporate chopped nuts, seeds, or dried fruits like cranberries or raisins for added texture and flavor.
– Adjusting Sweetness Levels: If you prefer a less sweet bar, reduce the amount of honey or use a sugar alternative.
Conclusion
In summary, these Crunchy Peanut Butter Rice Bars are a delightful, nutritious snack that’s simple to make and entirely customizable. They offer a great balance of protein, fiber, and healthy fats, making them an excellent choice for any time of day. Whether you’re preparing for a busy week ahead, looking for a post-workout treat, or simply craving something sweet, these homemade bars are sure to satisfy.
We encourage you to try making these bars in your kitchen for a delicious and healthy snack option. With the ability to adjust flavors and customize ingredients, you’ll find that these bars not only meet your taste preferences but also provide numerous health benefits. Enjoy the process of creating your own perfect snack!
