Delightful No-Bake Banana Cream Cups: A Sweet Escape Without the Oven
When it comes to desserts that are both quick to prepare and decadently delicious, Delightful No-Bake Banana Cream Cups are hard to beat. This recipe is the ultimate indulgence for those warm days when turning on the oven feels like a chore. With a perfect blend of creamy textures and refreshing flavors, these cups are made with simple ingredients that come together to create a delightful treat. The combination of cream cheese and Greek yogurt provides a rich base, while ripe bananas add natural sweetness, all layered atop a crunchy bed of vanilla wafer cookies. Whether you’re hosting a casual gathering or simply looking to satisfy your sweet tooth, these no-bake banana cream cups are sure to impress.
Understanding the Ingredients
To create the perfect No-Bake Banana Cream Cups, it’s essential to understand the role each ingredient plays in achieving that signature flavor and texture. Let’s break down the key components:
– Ripe Bananas: The star of the show, ripe bananas are not just the source of natural sweetness; they also contribute to the overall creaminess of the dessert. Choosing bananas that are perfectly ripe—yellow with a few brown spots—ensures that they are sweet and flavorful, making them the ideal choice for this recipe.
– Heavy Cream: This ingredient is crucial for achieving a light and airy texture in the cream mixture. When whipped, heavy cream adds volume and a luxurious mouthfeel, transforming the dessert into a rich yet refreshing treat.
– Powdered Sugar: Unlike granulated sugar, powdered sugar dissolves easily, providing the necessary sweetness without any graininess. It also helps to create a smooth consistency in the cream mixture.
– Vanilla Extract: A staple in many dessert recipes, vanilla extract enhances the overall flavor profile of the banana cream cups. Its warm, sweet notes complement the bananas and adds depth to the creamy layers.
– Cream Cheese: This ingredient is key to achieving the rich, creamy base that sets these cups apart. Cream cheese offers a tangy richness that balances the sweetness of the bananas and sugar, creating a well-rounded flavor.
– Greek Yogurt: Adding Greek yogurt not only contributes a delightful tang but also provides a healthier twist to the dessert. The creamy texture of Greek yogurt enhances the overall richness while keeping the dessert light.
– Vanilla Wafer Cookies: These cookies serve as the crunchy base of the banana cream cups. Their sweet vanilla flavor perfectly complements the creamy layers above, adding a satisfying crunch that contrasts beautifully with the smooth filling.
– Lemon Juice: A small but mighty ingredient, lemon juice is essential for preventing the bananas from browning. It also adds a bright note to the flavor profile, enhancing the overall freshness of the dessert.
Preparation Process
Now that we’ve covered the ingredients, let’s dive into the step-by-step process for crafting these Delightful No-Bake Banana Cream Cups. This guide will provide you with all the techniques needed to achieve the perfect balance of flavors and textures.
Preparing the Bananas
Start by selecting your ripe bananas. Look for bananas that are bright yellow with a few brown specks, as these will be the sweetest and most flavorful. Begin by peeling the bananas and placing them on a cutting board.
Importance of Tossing with Lemon Juice
To maintain the vibrant color of your bananas and prevent them from browning, it’s crucial to toss them with a bit of lemon juice. This not only helps preserve their appearance but also enhances their flavor by adding a hint of brightness. Use about one tablespoon of fresh lemon juice for every two bananas.
How to Properly Slice Bananas
When it comes to slicing the bananas, aim for even pieces. Slice them into approximately 1/4-inch thick rounds. This uniformity ensures that the bananas layer nicely in the cups and makes for an attractive presentation. After slicing, gently toss the banana slices with the lemon juice to coat them evenly.
Making the Cream Mixture
With the bananas prepared, it’s time to focus on the creamy filling. Begin by softening the cream cheese. This is best accomplished by allowing it to sit at room temperature for about 30 minutes. A softened block of cream cheese will blend more easily, resulting in a smoother texture.
Techniques for Achieving Smooth Cream Cheese and Yogurt Blend
In a mixing bowl, combine the softened cream cheese and Greek yogurt. Using a hand mixer or a whisk, beat them together until the mixture is smooth and free of lumps. If you’re using a hand mixer, start on a low speed to incorporate the ingredients without splattering.
Incorporating Powdered Sugar and Vanilla Extract
Once the cream cheese and yogurt are well-mixed, gradually add in the powdered sugar and vanilla extract. Start with about 1/2 cup of powdered sugar, adjusting to taste. Again, mix until everything is well combined and the sugar is fully incorporated. This mixture should be creamy and luscious.
Whipping the Cream
In a separate bowl, pour in the heavy cream. Using a whisk or a hand mixer, whip the cream until stiff peaks form. This means that when you lift the whisk, the cream will hold its shape rather than drooping. Be careful not to over-whip, as this can lead to a grainy texture.
Tips for Perfectly Whipped Cream
To achieve the perfect whipped cream, ensure that your bowl and beaters are cold—this helps the cream whip up faster and better. Additionally, using heavy cream with a fat content of at least 36% will yield the best results for stability and texture.
Folding Techniques to Maintain Airiness
Once your cream is whipped, gently fold it into the cream cheese and yogurt mixture. Use a spatula to scoop from the bottom and fold over the top, repeating this motion until the mixtures are just combined. This folding technique maintains the airy texture of the whipped cream, ensuring that your banana cream cups are light and fluffy.
By following these steps, you’ll be well on your way to creating delightful no-bake banana cream cups that are sure to be a hit at any gathering. Stay tuned for the next part of our article, where we will cover the assembly and presentation of these delicious desserts.

Assembling the Cups
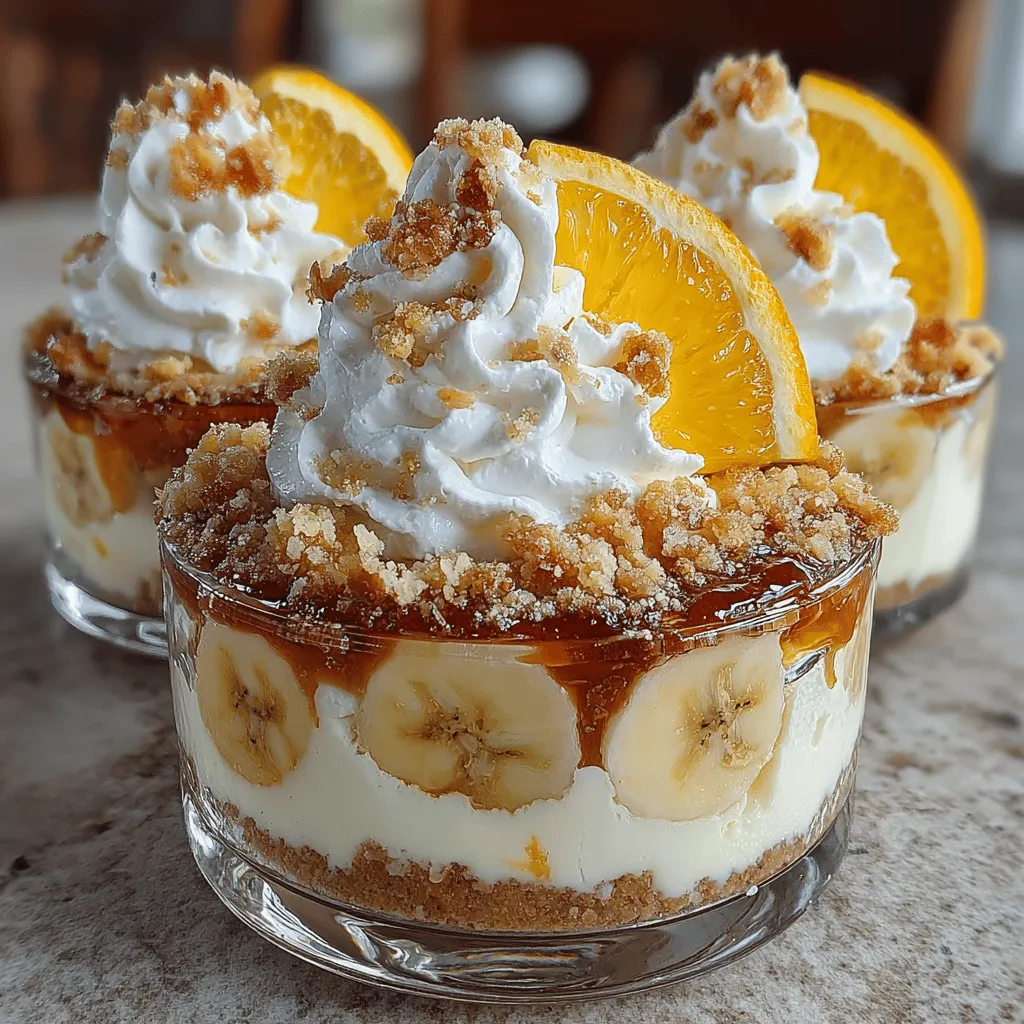
Creating your Delightful No-Bake Banana Cream Cups is an enjoyable task that allows you to showcase your culinary creativity. Begin by gathering your prepared components: the banana pudding, whipped topping, and any additional ingredients you’ve chosen to include. The key to a beautiful presentation is to layer the ingredients carefully in your serving containers.
Layering Techniques for Visual Appeal
1. Start with the Base: Spoon a layer of banana pudding into the bottom of each cup. Use about one-third of the total pudding mixture for this first layer. The pudding should be spread evenly to create a smooth foundation.
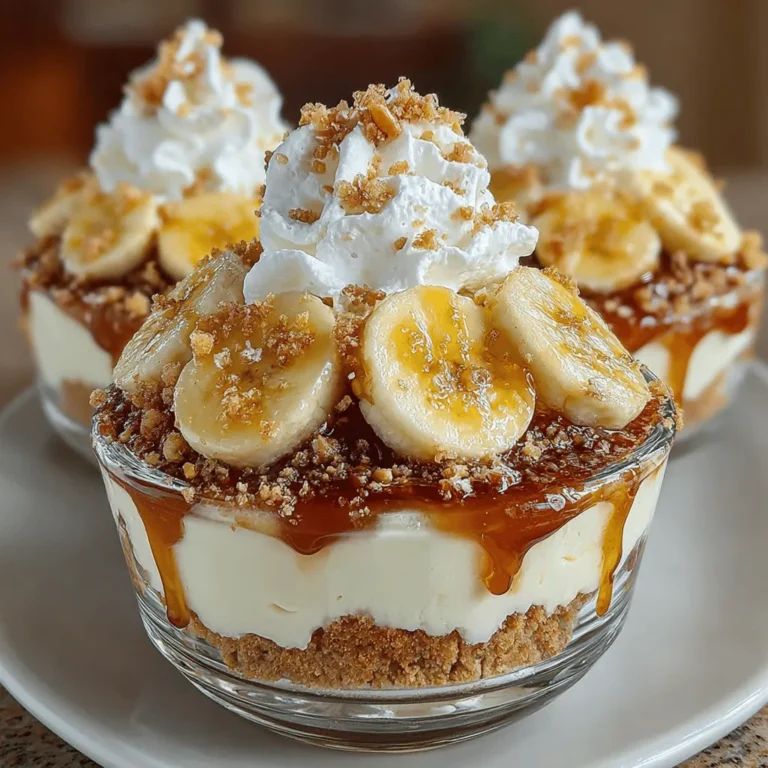
2. Add the Sliced Bananas: Next, layer in some freshly sliced bananas. Arrange them in a circular pattern for visual appeal, allowing them to slightly overlap. This not only enhances the look but also ensures that every bite has a taste of banana.
3. Whipped Topping Layer: Follow the bananas with a generous dollop of whipped topping. Spread it gently but evenly to maintain the aesthetic. You can use a piping bag for a more decorative finish if desired.
4. Repeat the Layers: Continue this layering process until you reach the top of your cups. Typically, two to three layers will suffice, depending on the size of your containers. Finish with a final layer of whipped topping to create a plush top.
5. Final Touch: For an extra touch of elegance, consider sprinkling some crushed graham crackers or chopped nuts on top of the final layer. This will add a bit of crunch and contrast to the creamy textures below.
Recommended Serving Containers
Selecting the right serving containers can elevate your dessert presentation. Here are a few suggestions:
– Clear Glass Cups: These allow you to showcase the beautiful layers of your banana cream cups, making each layer visible and enticing.
– Mason Jars: Ideal for a rustic presentation, mason jars are perfect for portion control and add a charming touch to your dessert.
– Dessert Bowls: If you’re serving a larger group, opt for elegant dessert bowls that can accommodate generous servings.
Chilling and Serving
The Importance of Chilling for Flavor Development
Chilling your assembled banana cream cups is crucial for enhancing the flavors and achieving the perfect texture. When the cups sit in the refrigerator, the flavors meld together beautifully, and the pudding thickens slightly, resulting in a creamier dessert.
Recommended Chill Time for Optimal Flavor
For the best results, refrigerate your banana cream cups for at least 2 to 4 hours before serving. This chilling period allows the pudding to set properly and ensures that your whipped topping maintains its light and airy texture.
Tips for Properly Covering and Storing
– Cover with Plastic Wrap: To prevent any odors from the refrigerator affecting your dessert, cover the cups with plastic wrap. Make sure it’s snug but not touching the whipped topping to keep it fluffy.
– Store for Freshness: If you have leftovers, your no-bake banana cream cups can be stored in the refrigerator for up to 3 days. However, it’s best to consume them within 24 hours for the freshest taste and texture.
Presenting Your No-Bake Banana Cream Cups
Creative Garnishing Ideas
Presentation is key when it comes to desserts. Here are some garnishing ideas to take your banana cream cups to the next level:
– Fresh Mint Leaves: Add a sprig of mint to the top of each cup for a pop of color and freshness.
– Chocolate Shavings: If you want to incorporate a chocolate element, sprinkle some chocolate shavings or cocoa powder on top.
– Drizzle of Caramel Sauce: A light drizzle of caramel sauce can enhance the flavor and add an eye-catching shine.
Using Extra Banana Slices
For a simple yet effective garnish, place a few additional banana slices on top of the whipped topping. Arrange them artfully in a fan shape or simply place them in the center. This not only looks beautiful but also emphasizes the banana flavor.
Adding Crushed Nuts for Texture
For those who enjoy a bit of crunch, sprinkle crushed nuts—such as walnuts, pecans, or almonds—on top of your cups just before serving. This adds texture and enhances the overall flavor profile of your dessert.
Nutritional Benefits of Key Ingredients
Exploring the Health Aspects of This Dessert
While Delightful No-Bake Banana Cream Cups are undeniably a treat, they also offer some health benefits thanks to their key ingredients.
Benefits of Bananas: Nutritional Value and Health Benefits
Bananas are not only delicious but also packed with nutrients:
– Rich in Potassium: This essential mineral helps regulate blood pressure and supports heart health.
– High in Fiber: Bananas provide dietary fiber, which aids in digestion and helps maintain a healthy gut.
– Natural Energy Booster: The carbohydrates in bananas offer a quick source of energy, making them an ideal snack or dessert ingredient.
Advantages of Greek Yogurt: Protein and Probiotics
Incorporating Greek yogurt into your no-bake banana cream cups not only enhances the creaminess but also contributes significant health benefits:
– High in Protein: Greek yogurt contains more protein than regular yogurt, which helps keep you fuller for longer.
– Probiotics: These beneficial bacteria support gut health and boost your immune system.
Understanding the Role of Cream Cheese: Moderation and Enjoyment
Cream cheese adds a rich, creamy texture to the dessert, but it’s important to use it in moderation:
– Flavor Enhancement: Cream cheese offers a tangy flavor that complements the sweetness of the bananas.
– Balanced Indulgence: While it adds richness, using reduced-fat cream cheese can help keep the dessert lighter without sacrificing flavor.
Why No-Bake Desserts are Ideal
The Appeal of No-Bake Recipes
No-bake desserts like these banana cream cups are perfect for a variety of occasions. Here’s why they appeal to so many:
Time-Saving Convenience
One of the greatest advantages of no-bake desserts is the time they save. Since there’s no need for an oven, you can whip up a delicious treat quickly, making them perfect for last-minute gatherings or busy weeknights.
Perfect for Hot Weather
No-bake desserts are particularly appealing during warmer months. They don’t heat up your kitchen, making them a refreshing option when you want something sweet without the fuss of baking.
Easy to Customize and Adapt
No-bake recipes offer endless possibilities for customization. You can easily swap ingredients based on your preferences or dietary needs, making them versatile for any audience. Whether you want to add different fruits, adjust the sweetness, or incorporate various flavorings, no-bake desserts are adaptable and forgiving.
Conclusion
In summary, Delightful No-Bake Banana Cream Cups are not only a treat for the taste buds but also a simple and flexible dessert option for any occasion. The combination of creamy layers and crunchy textures creates a well-balanced dessert that everyone will love. With minimal preparation and no baking required, this recipe is an excellent choice for both novice and experienced cooks. Enjoy the light, refreshing flavors of these banana cream cups the next time you need an easy yet satisfying dessert!
Whether you’re celebrating a special occasion or simply indulging on a casual night in, these banana cream cups will surely impress your guests and family alike. So, gather your ingredients, assemble your cups, and savor the delightful flavors that come together in this easy, no-bake treat!


