Indulge in Decadence: Classic Chocolate Éclairs Recipe
Chocolate éclairs are a quintessential French pastry that embodies elegance and indulgence. With their delicate choux pastry shells filled with velvety cream and topped with a glossy chocolate glaze, these treats have enchanted palates for generations. Often found in patisseries across France, éclairs have become a staple in dessert menus around the world, celebrated for their rich flavors and sophisticated presentation.
The allure of homemade éclairs goes beyond their exquisite taste; it lies in the journey of crafting these delightful desserts from scratch. While they may seem intimidating to some, the satisfaction that comes from mastering the art of pastry-making is truly rewarding. As you embark on this culinary adventure, you’ll not only develop your baking skills but also create a show-stopping dessert that is sure to impress family and friends.
Understanding Éclairs
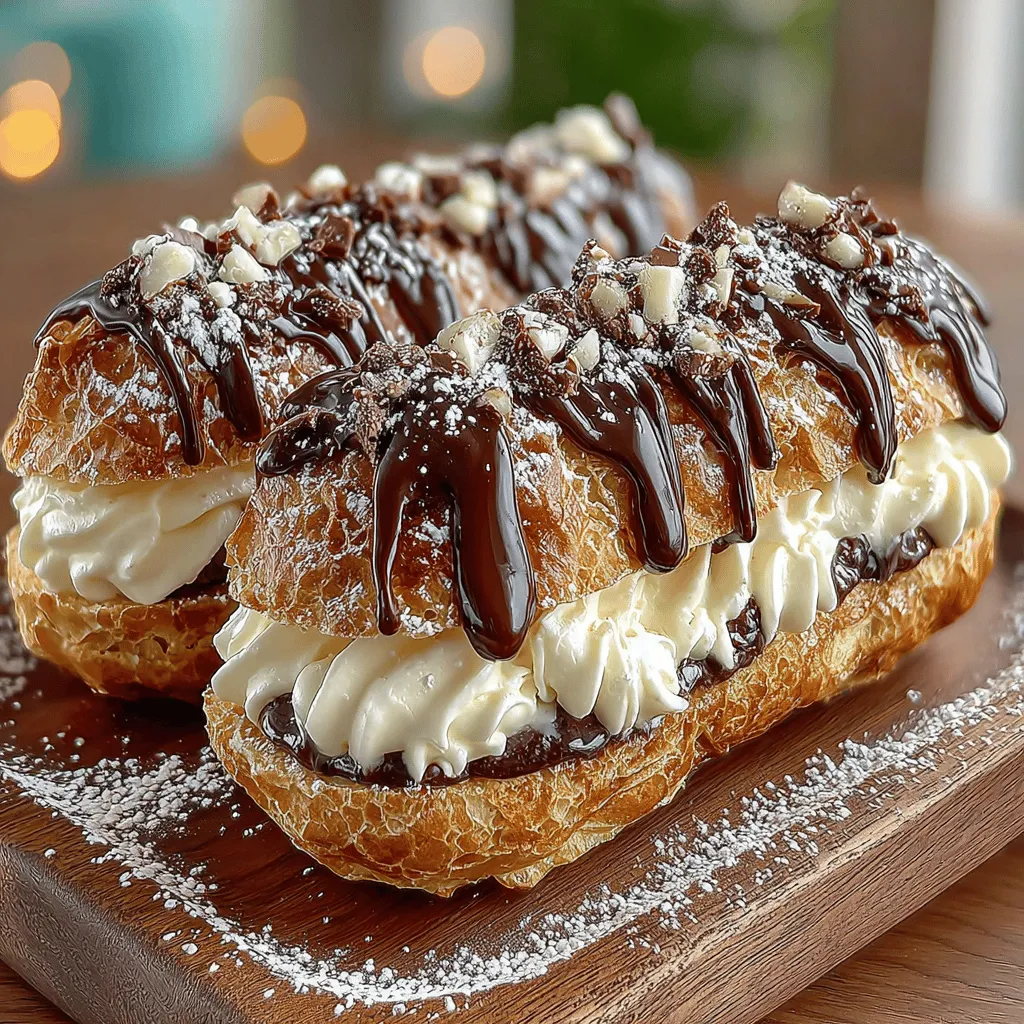
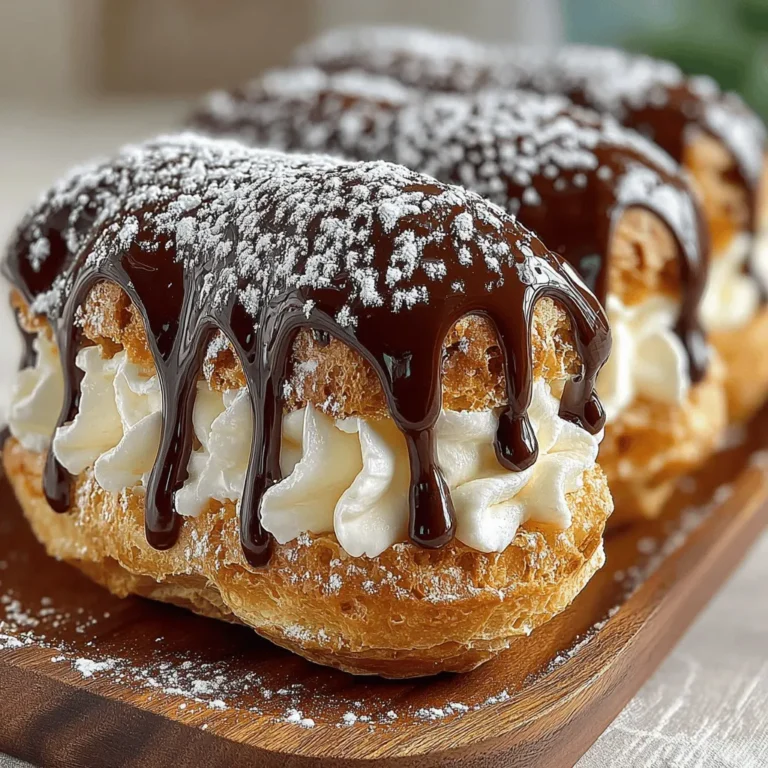
The term “éclair” comes from the French word for “lightning,” a nod to the pastry’s glossy finish that resembles a flash of light. Traditionally, éclairs are made with choux pastry, which is piped into elongated shapes, baked until golden brown, and then filled with a rich cream, typically pastry cream or whipped cream. The final touch—an irresistible chocolate glaze—elevates these pastries to a realm of decadence that is hard to resist.
Historically, éclairs date back to the 19th century and have roots in French patisserie. The exact origins are somewhat contested, but it is generally accepted that the pastry was popularized by the renowned French chef Marie-Antoine Carême. Over time, variations of éclairs have emerged across different cultures, each adding its unique twist. From coffee éclairs in Italy to matcha éclairs in Japan, these pastries have evolved while retaining their classic charm.
Mastering the technique of making choux pastry is essential not only for creating éclairs but also for a variety of other desserts such as cream puffs, profiteroles, and gougères. The versatility of choux pastry makes it a fundamental skill for any aspiring pastry chef.
Choux Pastry: The Heart of Éclairs
At the core of every delightful éclair is the choux pastry, a unique dough that, when baked, puffs up to create a hollow center perfect for filling. Understanding how to make choux pastry is crucial for achieving the light, airy texture that defines éclairs. The ingredients are simple yet crucial: water, butter, flour, and eggs.
The magic of choux pastry lies in its ability to rise. When the dough is baked, the moisture from the water turns into steam, causing the pastry to puff up and create that signature hollow structure. This process is not only fascinating but also a testament to the science of baking.
To make choux pastry, follow these essential steps:
1. Boil Water and Butter: Start by combining water and butter in a saucepan. Heat the mixture until the butter has melted and the water reaches a rolling boil. This step is crucial for proper emulsification, ensuring that the ingredients blend seamlessly.
2. Incorporate Flour: Once the butter has melted, remove the saucepan from heat and add all-purpose flour at once. Stir vigorously with a wooden spoon until the mixture pulls away from the sides of the pan and forms a cohesive ball. This step is vital for developing the structure and elasticity of the pastry.
3. Add Eggs for Consistency: Allow the dough to cool slightly before incorporating the eggs. Crack the eggs into a separate bowl and whisk them lightly. Gradually add the eggs to the dough, mixing well after each addition until you achieve a smooth, glossy consistency. The eggs are crucial for providing moisture, richness, and the necessary structure for the pastry to rise properly.
4. Test the Consistency: The final dough should be thick yet pipeable. To test if it’s ready, you should be able to draw a figure eight with the dough without it breaking. This indicates the perfect balance of moisture and structure.
Now that you’ve prepared your choux pastry, it’s time to take the next step: piping and baking the éclairs.
Piping and Baking Éclairs
Piping choux pastry requires a steady hand and a bit of practice, but with the right techniques, you can achieve perfect éclairs every time. Here are some tips for piping:
– Choose the Right Tip: Use a large round piping tip (about ½ inch in diameter) to create the classic éclair shape. A larger tip allows for a smooth flow of the dough, resulting in a well-shaped pastry.
– Piping Technique: Hold the piping bag at a 45-degree angle to the baking sheet. Start at one end and apply even pressure while moving your hand in a straight line to create the desired length. Release pressure at the end to avoid a pointy tip.
– Consistency is Key: Aim for uniform size and shape. This ensures even baking, so all éclairs rise consistently and finish at the same time.
When it comes to baking your éclairs, pay attention to the following tips:
– Optimal Oven Temperature: Preheat your oven to a high temperature, typically around 400°F (200°C). This initial burst of heat is essential for creating steam, which will help the éclairs puff up beautifully.
– Timing and Signs of Doneness: Bake the éclairs for about 25-30 minutes, or until they are golden brown. Avoid opening the oven door during the first half of baking, as this can cause the éclairs to collapse. Look for a golden color and a firm, puffed shape as indicators of doneness.
By following these steps, you’ll be well on your way to creating the perfect foundation for your classic chocolate éclairs. Embrace the process, and soon you’ll be ready to fill and glaze your éclairs, taking them from delightful dough to decadent dessert.

Creating classic chocolate éclairs at home is a rewarding experience that combines skill, patience, and a touch of artistry. In this section, we’ll delve into the crucial steps of crafting the cream filling, filling the éclairs, preparing the chocolate glaze, and the final touches for serving.
Crafting the Cream Filling
The cream filling is the heart of the chocolate éclairs, enhancing both their flavor and texture. This luscious filling balances the lightness of the choux pastry and the richness of the chocolate glaze, making each bite heavenly.
Ingredients Breakdown
To prepare the cream filling, you’ll need:
– Heavy Cream: The key ingredient for achieving a rich and velvety filling.
– Powdered Sugar: Adds sweetness and helps stabilize the cream.
– Vanilla Extract: Offers a warm, aromatic flavor that complements the other ingredients.
Step-by-Step Instructions for Whipping Cream
1. Chill Your Equipment: For the best results, place your mixing bowl and whisk or beaters in the refrigerator for about 15-20 minutes before whipping. Cold equipment helps the cream whip faster and increases volume.
2. Combine Ingredients: In the chilled bowl, pour in 1 cup of heavy cream, add 2 tablespoons of powdered sugar, and a teaspoon of vanilla extract.
3. Start Whipping: Using a hand mixer or a stand mixer, begin whipping the cream on low speed. Gradually increase to medium speed.
4. Watch for Soft Peaks: Continue whipping until soft peaks form. This means that when you lift the whisk, the cream should hold its shape but still have a slight droop.
5. Avoid Overwhipping: Be careful not to overwhip, as this can turn your cream into butter. Stop whipping as soon as you see soft peaks. If you accidentally overwhip, you can attempt to incorporate a splash of heavy cream to smooth it out.
Filling the Éclairs
Once your cream filling is ready, it’s time to fill those beautifully baked éclairs. This step is crucial for ensuring that each éclair is adequately filled without making a mess.
Techniques for Filling Éclairs
1. Prepare Your Piping Bag: Use a large piping bag fitted with a round tip (around 1/2 inch). If you don’t have a piping tip, you can simply cut the end of the piping bag to create an opening.
2. Cut the Éclairs: To fill the éclairs, you can either slice them open lengthwise or poke a hole at one end. For a cleaner look, it’s recommended to poke a hole, which allows you to fill them without disrupting the shape.
3. Insert the Tip: Gently insert the piping tip into the hole of the éclair. Ensure that the tip is deep enough to reach the center of the pastry.
4. Fill Gradually: Squeeze the piping bag gently, allowing the cream to fill the éclair. You’ll feel the pastry expand slightly, which indicates it’s filling up. Continue until you see the cream starting to peek out of the hole.
Alternative Fillings
If you want to experiment beyond the classic cream, consider these alternative fillings:
– Pastry Cream: A richer, custard-like filling perfect for a more decadent experience.
– Fruit-flavored Whipped Cream: Add pureed fruit like strawberry or raspberry for a fruity twist.
– Chocolate Ganache: For chocolate lovers, a rich chocolate ganache can be used for filling.
Creating the Chocolate Glaze
The chocolate glaze is what brings everything together, adding both flavor and visual appeal to your éclairs. A smooth, glossy finish elevates the presentation and taste.
Ingredients Analysis
– Types of Chocolate: You can use semisweet, dark, or milk chocolate, depending on your preference for sweetness and richness. Semisweet chocolate is commonly used for its balanced flavor.
– Heavy Cream: Used to create a ganache-like consistency for the glaze, enhancing its smoothness.
Step-by-Step Instructions for Achieving a Smooth, Glossy Glaze
1. Chop the Chocolate: Start by finely chopping 8 ounces of chocolate (semisweet or dark) and place it in a heatproof bowl.
2. Heat the Cream: In a saucepan, heat 1 cup of heavy cream over medium heat until it just begins to simmer. Do not let it boil.
3. Combine: Pour the hot cream over the chopped chocolate. Let it sit for about 2-3 minutes to melt the chocolate.
4. Stir Until Smooth: Gently stir the mixture with a spatula or whisk until the chocolate is fully melted and combined with the cream, resulting in a glossy glaze.
Tips for Melting Chocolate Properly
– Use a Double Boiler: If you’re concerned about burning the chocolate, you can create a double boiler by placing the bowl over a pot of simmering water.
– Avoid Water: Ensure that no water gets into the chocolate, as this can cause it to seize.
– Cool Slightly: Allow the glaze to cool slightly before using. This will help it thicken up a bit, making it easier to dip the éclairs.
Glazing and Serving Éclairs
Now that you have filled your éclairs and prepared the chocolate glaze, it’s time to put the finishing touches on your creations.
Techniques for Dipping Éclairs in Chocolate Glaze
1. Dipping Method: Hold each filled éclair by the ends and dip the top half into the chocolate glaze. Ensure the chocolate covers the top evenly.
2. Avoid Excess Glaze: After dipping, lift the éclair and gently shake it to allow any excess glaze to drip off. This will help you achieve a clean finish.
3. Setting the Glaze: Place the glazed éclairs on a wire rack to allow the chocolate to set without sticking.
Presentation Ideas
To serve your éclairs attractively:
– Arrange on a Platter: Place them on a decorative platter or cake stand to showcase their beauty.
– Dust with Powdered Sugar: For a touch of elegance, dust a light sprinkle of powdered sugar over the top before serving.
– Garnish with Fresh Berries: Add a few fresh berries or mint leaves around the platter for color and freshness.
Suggestions for Garnishing or Decorating Éclairs
– Drizzle with White Chocolate: For added visual appeal, melt some white chocolate and drizzle it over the top of the glazed éclairs.
– Sprinkle with Nuts: Chopped hazelnuts or almonds can add a delightful crunch and contrast to the creamy filling.
– Use Edible Flowers: For a sophisticated look, consider garnishing with edible flowers.
Conclusion
Creating classic chocolate éclairs at home is a joyous and satisfying culinary adventure. From whipping the perfect cream filling to achieving a glossy chocolate glaze, every step enhances your skills in the kitchen. As you savor each bite of your homemade éclairs, you’ll appreciate the effort that went into making them.
We encourage you to share your experiences, variations, and creative twists on this timeless pastry recipe. Whether you stick to tradition or explore new flavors, the art of pastry-making is a celebration of creativity and taste. Enjoy your chocolate éclairs and the pride that comes with mastering such a classic treat!


